
Your Cart is Empty

Use KAM snaps to transform your scrap fabric into beautiful bracelets in well, a snap! So easy to do, kids can make their own, while learning about up-cycling at the same time.
How to Make a Quick Braided Fabric Bracelet with Snaps
Tutorial below provided by Samantha of bobaloo!

The original Bobaloo and I were making bracelets for Craft Hope last week and we came up with these little cuties to use up some of my fabric scraps. Using KAM snaps makes this project silly quick – it took me longer to type this up than to make the bracelet – but if you don’t have snaps, Velcro would work too.
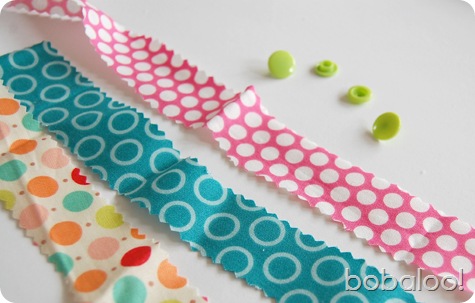
Supplies:
1. Cut one strip from each of three fabrics, 1 1/2” wide by 16” long, using pinking shears or regular scissors.
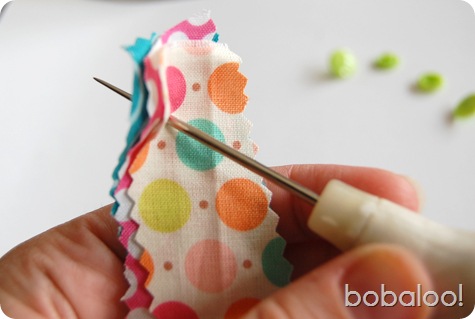
2. Stack the strips on top of each other, right sides all up, at one short end. They don’t have to match perfectly – we’ll trim them up at the end. Using your awl, poke a hole about 1/2” from the end of the strips.
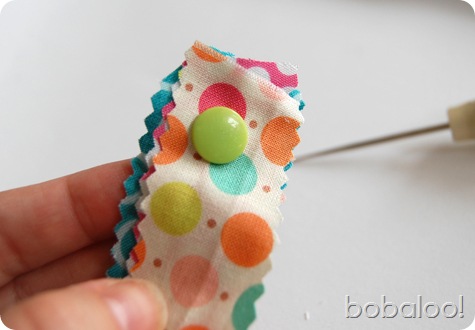
3. Attach one snap with the cap side up.

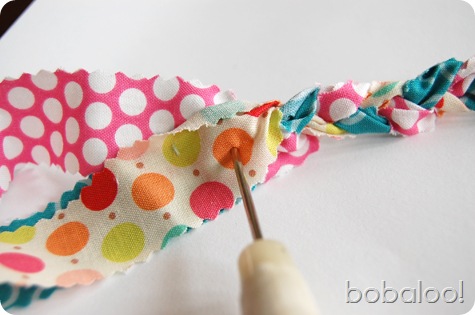
4. Braid the pieces of fabric (I had my cute little helper holding the snap end for me). Try to keep the right sides of the fabric up – you may need to twist the strips a little to keep them facing the right direction. Braid loosely for a wider bracelet, tightly for a narrower bracelet.
5. Once the bracelet is near the length you’d like it, stack the strips on top of each other just like you did at the beginning.
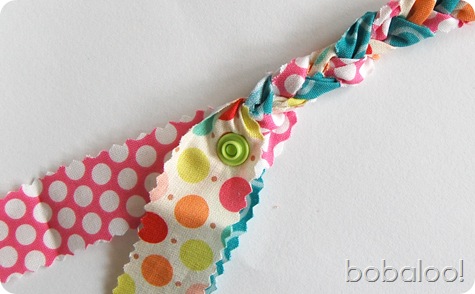
6. Install the other snap with the cap on the wrong side of the bracelet.
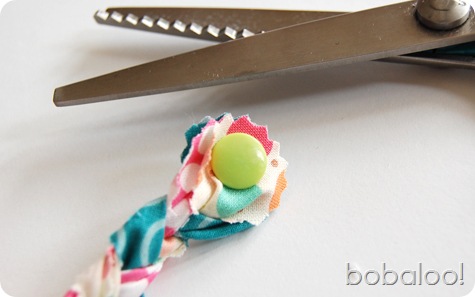
7. Using your pinking shears or scissors, trim the ends of the bracelet in a nice rounded shape.

8. Put that bracelet on the nearest kiddo or pack it up and send it off to Craft Hope!