Your Cart is Empty

When you have a crying baby that wants her binky and wants it now, you don't want to waste precious time searching for that doggone pacifier. Where there is a pacifier, there is a will to get lost or dropped. Below is a quick and easy, no-sew tutorial for a pacifier holder clip / leash using KAM snap fasteners that will allow your little one to always keep her binky close and clean.
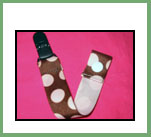
Materials needed:

1. Cut your ribbon to 12" long. Your pacifier holder / leash will be approx. 8 inches long when complete. Adjust the length of your cut if you want a shorter or longer leash.
2. In a well ventilated area and according to directions, apply fray check to both ribbon ends. If you don't have fray check, you can use a lighter and singe the ends to prevent fraying.
3. Fold 1/2" of ribbon over at one end.
4. Insert your cap through both layers of ribbon.

5. Place your socket on top.

6. Using pliers or a press, install your snap button fasteners with the socket and cap positioned as shown.

7. Approx. 1" apart (measured from the center of the caps), insert your other cap.

8. Install your stud and cap as shown.

9. Your set snaps will look like this.

10. Thread your ribbon through your pacifier clip.

11. Snap your your socket and stud closed. You want your clip to be positioned as shown, with the folded part of your ribbon on the underside (side you don't see).

12. Repeat steps 3-8 with other end of your ribbon. Fold 1/2" of ribbon over at other end and insert your cap through both layers of ribbon.

13. Install your socket and cap as shown.

14. Approx. 1" apart (measured from the center of the caps), insert your other cap. Adjust your cap placement if you want more space between your snaps.

15. Install your corresponding stud and cap as shown.

16. Your set snaps will look like this.

17. Tie any string or elastic band into a knot. You can use anything around your house. I used an elastic neck band that came with those badge tags you get at conventions. But you can use an elastic hair band, twine, shoelace, etc.. It just needs to fit into the hole of your pacifier.
The string/elastic band will allow you to easily remove your pacifier from the clip holder/leash.

NOTE: You can skip adding an elastic string/band if your pacifier has a large ring like below. You'll just want to space your snaps farther apart to allow the ring to fit between your snaps. Insert the ring instead between your snaps and close together.

18. For pacifiers with a hole design like the WubbaNub brand, insert your string/elastic band between your snaps and close.

19. Thread your string/elastic band through your pacifier hole and you're done! You can attach your pacifier clip holder to your baby's shirt, purse strap, or diaper bag to prevent it from getting lost or dropped, keeping baby happy and mama sane. =)

KAM snap fasteners are widely used in a variety of baby items from cloth diapers to baby clothing. KAM plastic fasteners and pacifier clips are CPSIA Compliant and have been lead and phthalate tested to be safe to use on children's clothing and products.